Monday, May 25, 2009
1986 Chevette Rescue Part One
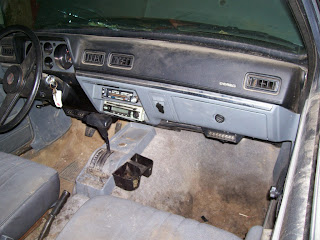
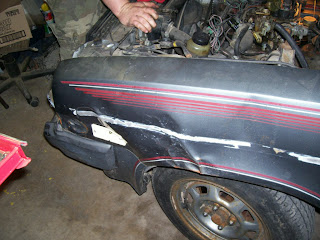
We bought a 86 Chevette, with body damage and busted windshield.
So now comes the fun part, starting to restore the chevette for the wife’s driving pleasure. She will be a cute little car, lots of work to do though. My first plan was to get her running good. She ran rough, really rough and weak. Had to push her up small hills. Compression checked out ok, but everything was in need of care.
One of the first tasks was rebuilding the carb. All kinds of un hooked vacuum lines startled me at first, but I fought through it. I pulled the carb off and started to rebuild it, no real issues, pretty easy rebuild. Worse part was seating the top again, it didn’t want to fit, a solenoid had to be put in just right to fit in the fuel bowl.
The second thing we did was to lose the AC pump. Dead weight. So we pulled the alternator, and took the pump off, the bracket came off later. With those gone it was time to get to the plugs. Pulled the plugs and replaced them. Stuck the old wires on so I could paint and not ruin the new ones.
I pulled the valve covers, the gaskets were bad, and painted the valve covers Chevy orange while I had them off. I threw them on with new gaskets and continued my tinkering.
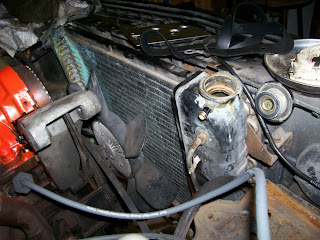
Found out the radiator was shot, lots of green corrosion on the top seam. We have a new one to put in. But I pulled that out to have more room to work. That top seam is a pain I’ve even tried welding them without success.
I also got to the brakes and found out the lovely hex bits I have rip through the old bolts like hot butter. So I have new ones on order, I may just take my angle grinder and gut the old caliper off. There is a brake leak somewhere, haven’t found it yet, mainly focusing on the engine, but had to jack it up and take the tires off anyway so looked the nonexistent pads and old calipers.
I did pull the old front shocks, which toppled to miniature size once removed, now we have pretty yellow gas shocks.
So the brakes are left to do, and so is replacing a wheel stud, both on order. I destroyed the stud taking a rusted on lug nut off the hard way.
While under the car I changed the oil, didn’t look too bad, little runny and black, but better than I expected. The filter was easy to get to, under the driver’s side you can get a hand on it easy.
I also pulled the tranny pan, and changed the fluid. That was very easy, hardest part was getting the gasket that the auto parts store packaged folded in half to say flat enough to get the bolts started. The vac modulator on the other hand is a pain, I didn’t change that out, I have a new one, but it is waiting for me to get more motivated to cram my hands into the abyss of the transmission folds.
The exhaust is snapped off at the manifold. I found this out by tugging on it. I knew the car was loud, and to my surprise the exhaust came right out, bent up so bad the flared lip popped out the flange off the exhaust manifold.
I plan on rerunning the exhaust on it, hate cats. Catalytic convertors are only there to plug up and rust through. So I wasn’t heart broken when the exhaust came right off.
So the fluids have been changed. New wires, plugs, all the good stuff was all coming along.
I went to take the old cap off the dizzy, and got a wonderful surprise. I had been watching for something that would make car run weak, and up to this point my only suspect was vacuum lines. But as I went to remove the cap the whole dizzy turned. It wasn’t clamped down at all.
So I figure that was off time. Very likely with the cap dancing around like a drunk at a wedding. I found the clamp, easiest way to get to it is by going in under the driver side like you are reaching for the oil filter. After tightening it I decided to set the timing.
I pulled the #1 plug out. By the way the plugs run 1-2-3-4 from front of the engine (fan) to the back (firewall), the firing order clockwise around the cap is 1-3-4-2. Stamped right on the intake manifold.
I TDC #1 and pulled the cap, the rotor was about 10-15 degrees after the tower. So the dizzy isn’t even close to lining up. No matter how you rotate it the vac can still gets in the way from it being on.
I then decided, hey lets pull the dizzy, and move the rotor so I can make a tower line up with TDC. The thingy (sticker) under the hood states to time it 8 degreed before top dead, and it was at about 10 after.
So I took the clamp off and mightily pulled on the distributor. Didn’t come out. Hmmmm. Guess what I forgot about. The fuel pump rod. That’s right the dizzy turns and moves the fuel pump rod. So I tried and tried to get that damn rod up, and it wouldn’t budge.
After an hour of prying it with a screwdriver I knew there must be a better way. I took the fuel pump off, what the hell; I’m going to replace it anyway. After pulling the fuel pump the rod slides up in there so easily.
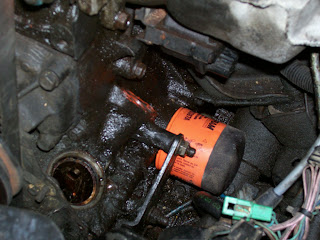
So I took the fuel pump out and slid the dizzy out. I put finger prints all over my nice new rotor while I was at it. At this point we went out to find a dizzy gasket, and fuel pump + gasket. They are on order. So it sits at TDC, waiting for the time I can drop the dizzy in and set the tower to the rotor.
While I have nothing else I could do, it was at this time I pulled the AC brackets. And I loosened the power steering pump to get the belts off. And changed the thermostat and gasket. With two days or so to wait on parts I’m going to get those calipers off, and see what else I can tear into.
But it has been fun, still working on project one, the engine and transmission. Next project is the brakes and suspension, though I’m picking at that while I can. Then exhaust, and then body work, leaving interior for the last.
I really think the timing made it run weak that and ½ the vacuum lines missing, someone else came and looked at it and was thinking about buying it, if things had been different I hoped they know how to set timing because I bet that’s what was wrong with it.
That’s my first blog of this project; stay tuned and become a follower to see how this ugly little beat up chevette that barely runs become
Thursday, May 21, 2009
The Ford Bronco
So we bought a bronco, 80s full-size monster, with 6” of lift and 33.5” tires. For $500 it had some issues, we are still working out the kinks. It is about an hour away, so getting to it and remembering all the tools is the biggest pain in the ass. But we are getting closer and closer to having it done.
So far we have tuned it up, and the gas tank leaked so we took it off so I could fix it. We have new brake lines, and other miscellaneous parts, not looking for a beauty pageant winner, but a go anywhere gutted old Bronco.
But this blog is of the gas tank variety. We bought the truck and promptly went to put gas in it, and found out you can only put about half a tank in or it runs all over the place. So we got it to my mom’s and parked it, to do some work. Gave it a fancy camo paint job, put some cab lights on her, did some brake work, got it stuck in the middle of a pond a couple of times, new tires, wiper motor, and so on. So it sat, now we’ve picked up the work on it again. It can be ugly, but it will run, drive, and stop well for me.
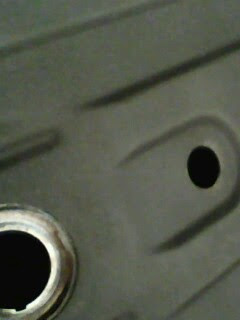
So I pulled the tank, it was rusty, and had no visible holes. I brought it to my garage and shined a light down in her with the garage pitch black. The way it leaked I thought I’d have major holes, but instead I had pin sized holes, pretty close together. There was one odd ball all by it’s lonesome.
I blasted the tank off, and shined my light in the top with the garage dark and marked where the holes where. If light can get out, so can gas. I then got the welder out, and took a stick and tapped over each hole sealing it in weldie goodness. To finish it up I put a liberal amount of permatex radiator and gas tank repair over the rough spots over and around the welds, and smoothed it out.
When I could see no light shining out like an odd shaped disco ball I tested for leaks with water. It doesn’t blow bubbles submerged.
So I then primed the hell out of it. To finish the monstrosity I rubberized undercoated the entire tank, with about six passes. I managed to put one good scratch in it when taking the tank to my moms, but other than that it came out fine. And I do have to say, it looks like a new tank. I even fished out five or six tiny rocks that were rolling around in it, and air blasted the inside clean.
So the new tank, well old tank with a makeover, is sitting in the Bronco, waiting for the day it will be put back in. I’ll have it done this summer. Still some work to go, but not too bad. I just hope it fits beside my garage when I get it done.
Wednesday, May 20, 2009
1998 Volkswagen Transmission Fluid Change.
So more work on the VW.
If you’ve been reading you know we have a 1998 VW, that has a little 2.0 in it. I did the struts mounts a while back that took care of the front end clanking. Then tranny started to shift rough, but the computer code read lack of fuel pressure, and bad fuel pump. So I changed out the fuel pump. An easy job, you take the carpet out of the back hatch, remove three screws, and there it is. Pull the old, pop in the new. Changing out the plastic hoses is the worst bit, but nothing too challenging, took me about three hours including a test drive.
But as I fixed that, I noticed she had a little more pep, but the transmission still shifts late and hard. Well ok, I didn’t think the fuel pump would fix the shifting issue, but seeing as the damn little car learns how the owner drives to “Set up” itself for better performance and mileage, anything is possible.
At this point I realized two things, I hate electronics on cars, and VWs are expensive to fix. The fuel pump costs over three hundred bucks, the strut mounts forty a pop, the starter about two hundred and thirty. And the thing is now shifting late and hard.
So another stab at it, I changed the transmission fluid. Little did I know how big of a PAIN IN THE BUTT this would be. Did you know the 1995 and later VWs don’t have tranny dipsticks. Nope, in fact they claim it is a sealed unit. Volkswagen engineer are evil people.
Well after I decide to change it, I decided it can’t be sealed, and went a hunting. I can’t take the VW anywhere, because one shop I took it to, so I could get the codes read, told me there was no computer the car was made in Mexico. This was the only tranny shop that would look at VW transmissions. Everywhere else is a bust, besides dealerships. No offense to good dealership mechanics, but most of them I trust as much as my dogs with wrenches and screw drivers taped to their paws. The only reason I took it in was to get the codes. Which of all places, AutoZone ended up reading them.
But even with the codes the main problem of the VW, late hard shifts, still is beyond grasp of the technology. I get no error, and it is a TPI electronically controlled tranny, so no modulator, or vacuum lines can be at fault, just little round cylinder type boxes that obviously control the shifting. The speed sensor doesn’t do the shifting points on the VWs, it just relays to the speedometer, and the shift sensor is built in the little solenoid do jobbies.
But any way, 60,000 miles and never a tranny fluid change. So I decide to change it. Step one was fining out where to add more, I knew I can take the pan off and drain it, but how do I get it back in?
Well VW was nice enough to have a spot (sealed unit my asthmatic donkey) right below the starter, with a stupid little snap on and in cap is the tranny fill tube.
So I pulled the plug out of the pan. A little tranny fluid came out. Upon inspection I found the “how do I know if it’s full” device. When you take the plug out, there is another plug, a plug up inside the plug hole, little red or orange plastic piece. Both the tranny pan bolt, and the little red tube up inside are 5mm metric Allen wrenches by the way. So I took out this little two inch or so tube and boom brownish black transmission fluid came pouring out.
I realized this tube was where the VW-matic auto computroller was connected to measure the transmission fluid. It was clear from working on other cars, trucks, tractors, planes, machinery, ect. . . how this worked. And I’ll tell ya later.
So I now drained the pan. I took out the four, yeah only four, bolts that hold the pan on, dumped the rest of the tranny fluid. I then cleaned the pan out, the little red tube, the pan bolt, and removed the old gasket.
Next step was taking the old filter out. No problem grab and pull (mine fell out), I lost the rubber ring up inside the transmission but with 5 seconds and a screw driver I popped it out. The new filter just shoves up in it. It will hang a little weird, but that’s how it goes. The old one fell into the pan when I moved the pan, so it must be a loose fit with some reliance on the pan for position.
I then put the new gasket on, and screwed the little red tube back up into the plug hole, and loosely put the plug bolt in.
With everything in place I found a section of hose, and a funnel. I jammed the funnel into the hose, and then pried out the fill tube stopper cap, and shoved the hose in. I measured what I had taken out of the transmission and added the same amount of new fluid.
Ok so about the fluid. $17-23 bucks a liter. Nothing is cheap on the VWs. I had to go to a dealership to get it, as nowhere in town carried it. Note, AutoZone, Advance, and other major chains tried to sell me Castrol Foreign transmission fluid. Don’t use it, it is red; don’t put red tranny fluid into this. It needs special Audi/VW fluid, which is yellowish clear. Volkswagens are weird.
So I had the fluid, I had my tube and funnel jammed in place; I knew how much was in it. So I put that amount of fluid back in it. Then I ran the car until it was up to normal temperature, and ran it through the gears about 100 times.
So how do you know when it is full?
Well that red tube plug that sits up in the plug hole, into the pan comes into play. Upon the engine being warm, and the fluid being expanded, you would normally hook a sensor up to the plug hole. If the pan is too full the warm fluid will spill out over the top of the tube plug, and out the plug hole, kicking the sensor making it say too full, if none comes out the sensor will scream not enough.
So what you want is a no pressure drip. That’s what the sensor is looking for, and if you don’t want to spend $8,000 on a sensor for the VW, just pull the plug out and watch. It should drip like a leaky faucet, drip, drip, drip, drip, and so on. It is a stream too much, if no fluid comes out not enough is in the pan.
I’ve encountered this set up on European racers that don’t like dip sticks in their pretty little led lit engine bays.
So I topped off the fluid, took about 3 liters, about ¼ liter more than came out.
Then put the plug in tight.
And off for a test drive, at first . . . . fine. Then boom back up 50000 rpms before it shifts. So I checked the fluid level again, and had the computer checked, both indicate the transmission is fine. I’d added, and drained the fluid about ten times to try and check the level in case I was wrong with no improvement.
So after all this the car still shifts late. I’ve looked into transmission parts, and they are pricey as well. It still runs and drives fine, just doesn’t want to shift from time to time. I’m about done putting money into a non-Chevy.
A few days later, after some fishing, that blog will be coming as I try to catch up the interesting stuff that is me, I found something little and cute. Yes, the wife loves the VW, it is little and cute, gets great mileage.
But we found a 1986 Chevette. Yeah, little and ugly. But I can rebuild the engine, car, and do an off body for less than $2,000. Right now we’ve bought it, and the basic tune up supplies, including suspension, and a carb rebuild kit, we have the exhaust planned, plus other possible thing such as alternator, and fuel pump. All together the total bill is less than the starter and fuel pump for the VW. So the VWs days maybe numbered due to upkeep costs. I maybe blogging about pimping a Chevette real soon. A brief preview . . . I maybe will; be fabricating the rear to take real vette tail lights, be fabricating the front end so accept different headlights, running a glass pack exhaust, and more. . . . That’s your teaser.
But the Volkswagen has shifted weird from the start, and still is slowly shifting worse and worse. I am not sure if I want, or if it worth rebuilder her. The parts are so expensive, maintenance is expensive, and with the VWs it always seems something needs done.
Saturday, May 9, 2009
Grilling, a pork steak story.
So a few days ago I decided to light up the grill. Nothing too surprising if you know me, I am a grill master. Well I try to be a grill master.
I pulled some pork steak out of the fridge and set to my task, making meat edible.
Step one of course is preparing the meat. I season almost everything in a similar manner. First cookies rub, then some fat man rub, then I re rub the entire piece of meat with sauce. The sauce is either bbq, steak, or other (dressing, marinade, depends on the meat), then I let it sit and soak for about ten minutes in it's glazed goodness. I only season one side.
Once the meat is seasoned, I light up my grill. It is a good grill. Propane, which I like better than charcoal. Easier to get the grill going, you don't get coal taste, and it is easier to control the temperature, ha. One side of my grill is always hotter, the burner is tilted for some reason, came that way, and the fire is closer on one side. It isn't bad if you rotate, but a variety of thickness in meats can screw up your rotation plans.
So I took the pork outside, and put it on the grill. This is the dogs favorite part.
I was out of cigarettes, I'm quitting after finals this year. But out of smokes I found a CC, Cusano cigar. Almost as good as the meat itself.
So puffing on a cigar, and drinking bud light I cooked the meat.
I try and cook oneside to completeness, then flip and cook the other side. I cook the un seasoned side, so as the meat pores open up my seasoning melts into the steak. Many people season both sides, but then you get burnt seasoning on one side. My way the season doesn't burn, it sit on top and melts into the juice and blood that appears on the top. When the far side is about cooked or cook, I flip. Of course there is careful rotating of the meat during this pre flip time.
After the flip I cook the other side. Then I give a few mercy flips to drain off excess blood and juice that has bubbled up from the seasoned side being cook.
I never overpower the meat with seasoning, just enough to add flavor. Seasoning one side helps to not over power the meat. I cook on low, long heat. For beef I try and leave it medium at the most, rarer the better. I am paranoid with pork, so I cook the hell out of it. Not burnt, but give it a little char, but leave the meat inside white, juicy, and with out trichinosis.
So I finished my grill, packed up two of the pork steaks, and ate one. Turned out great. I did finish the Cusano after I ate, and had a few more beers. It does beat working on a car all night, but I have many many many more car related blogs on the up and coming.
Thursday, May 7, 2009
A New Noise, Cheap Shock Extenders.
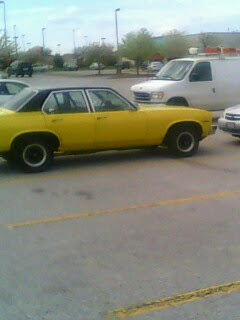
Well I got the lag out of the Nova, and boom a noise popped up. An odd noise, not a good noise. This was the noise I knew was going to be evil, or something stupid.
I heard a bad grinding noise, mixed with what sounded like my exhaust being ripped off. The first day this year I had her out I heard it a little, then it went away. Then it came back. Then it went away. Second day it came back with a vengeance, sounded like someone was kicking the crap out of the back of my car.
At first I thought it was "winter brake dust" working itself out. But not after the second day.
First thought was oh no, the rear end is clunking. I stomped the peddle either to see if the posi was working with no lag, or snap the axle and finish it off. No lag, no pull. Ok the back axle was fine. I didn't break it.
Maybe the exhaust was dragging? But no, the sound was hit and miss, not constant. What else, wheel bearing? Those usually scream. Brakes? Rear wheel cylinders usually leak, not freeze and grind when they go out.
So I drove home clunking and grinding all the way. When I got home I decided to jack the rear end up and take a peek. I jacked both sides up and listened as I turned the wheels.
Nothing. Not a sound. No axle play, the brakes didn't stick, no noise. So it had to be something while weight was on the car or the tire was spinning faster than my hand could move it.
So I pulled off the passenger brake drum, perfect.
So I pulled off the driver brake drum, perfect . . . wait a minute.
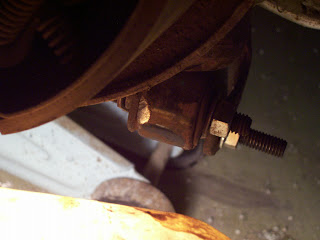
My driver side shock was a bit too short when I installed my 5" drag shackles so I had to put an extender on the base of the shock.
So the base of my shock was held up, and the extender mount now had flipped out, holding the shock against the lip of my brake drum. I noticed this when I looked at my shock.
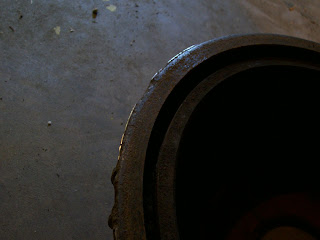
There was a lovely polished, ground down, spot on the shock, and when I looked at my drum there was a polished edge to it.
So the grinding must of been the mount and shock rubbing on the drum, when it caught a divot, it banged. Sometimes it banged hard enough the kick the shock back up, and in place. Then no noise until I cornered or hit a bump that gave it enough play room to let the drum and shock start to make out.
So I took the extension mount off.
Unfortunately the shock wouldn't reach(knew this), however I jacked up the rear suspension, and got enough slack to bolt the shock on. I lost no ride height but I know the suspension is pulling on the shock, hard.
I am not too worried about the shocks. My rear end has heavy duty leafs, 5" drag shackles, and 2500lb overloads. The shocks are just for show, the never get to bounce more than a 1/8" on a rough road. That and the shocks are about 8 years old. If I put new ones on they "freeze" and go bad in months, this happens because they don't get to move, they are pretty much held stationary 90% of the time. Car doesn't drive in winter, and when it does drive it takes a good bump then the socks only get about a 1/8-1/4" of bounce. I know because I've stood in my trunk and jumped up and down.
But the noise should be fixed now, I just have to decide whether to cut the shock extension mount down, or just not use it. I hate to have it rub again, but I don't want the shock being ripped apart and coming off while driving. I worry about it hitting my gas tank and putting a hole in it.
But alas, it was stupid problem noise not a evil noise. So the moral is always look for stupid problems, and don't buy cheap shock extenders.
I heard a bad grinding noise, mixed with what sounded like my exhaust being ripped off. The first day this year I had her out I heard it a little, then it went away. Then it came back. Then it went away. Second day it came back with a vengeance, sounded like someone was kicking the crap out of the back of my car.
At first I thought it was "winter brake dust" working itself out. But not after the second day.
First thought was oh no, the rear end is clunking. I stomped the peddle either to see if the posi was working with no lag, or snap the axle and finish it off. No lag, no pull. Ok the back axle was fine. I didn't break it.
Maybe the exhaust was dragging? But no, the sound was hit and miss, not constant. What else, wheel bearing? Those usually scream. Brakes? Rear wheel cylinders usually leak, not freeze and grind when they go out.
So I drove home clunking and grinding all the way. When I got home I decided to jack the rear end up and take a peek. I jacked both sides up and listened as I turned the wheels.
Nothing. Not a sound. No axle play, the brakes didn't stick, no noise. So it had to be something while
So I pulled off the passenger brake drum, perfect.
So I pulled off the driver brake drum, perfect . . . wait a minute.
My driver side shock was a bit too short when I installed my 5" drag shackles so I had to put an extender on the base of the shock.
So the base of my shock was held up, and the extender mount now had flipped out, holding the shock against the lip of my brake drum. I noticed this when I looked at my shock.
There was a lovely polished, ground down, spot on the shock, and when I looked at my drum there was a polished edge to it.
So the grinding must of been the mount and shock rubbing on the drum, when it caught a divot, it banged. Sometimes it banged hard enough the kick the shock back up, and in place. Then no noise until I cornered or hit a bump that gave it enough play room to let the drum and shock start to make out.
So I took the extension mount off.
Unfortunately the shock wouldn't reach(knew this), however I jacked up the rear suspension, and got enough slack to bolt the shock on. I lost no ride height but I know the suspension is pulling on the shock, hard.
I am not too worried about the shocks. My rear end has heavy duty leafs, 5" drag shackles, and 2500lb overloads. The shocks are just for show, the never get to bounce more than a 1/8" on a rough road. That and the shocks are about 8 years old. If I put new ones on they "freeze" and go bad in months, this happens because they don't get to move, they are pretty much held stationary 90% of the time. Car doesn't drive in winter, and when it does drive it takes a good bump then the socks only get about a 1/8-1/4" of bounce. I know because I've stood in my trunk and jumped up and down.
But the noise should be fixed now, I just have to decide whether to cut the shock extension mount down, or just not use it. I hate to have it rub again, but I don't want the shock being ripped apart and coming off while driving. I worry about it hitting my gas tank and putting a hole in it.
But alas, it was stupid problem noise not a evil noise. So the moral is always look for stupid problems, and don't buy cheap shock extenders.
Labels:
1976 Chevy Nova,
Grinding noise,
sbc.,
Shock extension
Tuesday, May 5, 2009
Fuel Pump of a SBC
So lets go back to mechanic stuff, fishing was fun but it doesn't make the cars run. It's why the cars run. No not really.
So I started up my nova this year, and took her for a drive. I was disappointed when I got on it and put put put put vroom. I had a dead spot on acceleration.
First suspect was timing. But it ran fine before I parked her for winter. Timing can't just change itself. A spring can break in the vacuum advance, but the base timing can't change itself, unless you have a a major mechanical fault.
So that was ruled out I started to suspect the carb. Maybe I some how bumped the jet screws, perhaps? Not likely, I did turn them up hair just in case. I have to turn them back down now that I think about it, it is running just a hair rich.
So I had another suspect, the choke. I drove the car for five minutes, came home the engine barely read 100 degrees and the choke was wide open. Perhaps it was adjusted too lean? Opening to fast starving the poor car of the fuel it desperately needed. Later as you will find out the gauge proved unreliable
But as I sat and thought about it, I realized something, something big. Since I put the 327 in I don't know how old the fuel pump is. No idea, could be original from 1968.
While I was at it I change the fuel filter. A long time ago I took the filter out of the tank, and carb, and just use an in line filter. I have no idea what the fuel filter is for actually. I take it in when I need a new one and get a new one. I think it was for a Toyota? I don't know, I had an issue with the filters, I bought the car for 250 or so bucks because no one could figure out what was wrong with it. It was also brown and rusty, missing a back bumper, but had four new tires. So I bought the car, replaced all kinds of things, only to find out the fuel filter in the carburetor was backwards (long story). I took it out threw it away, took the "net" filter out of the tank threw it away, and ended up with my Toyota in line filter, it was just laying around anyway.
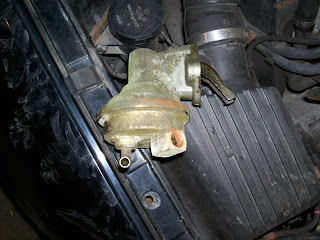
So I popped the new filter in, and installed the new fuel pump. Which is what this blog is about. The Fuel Pump. So the fuel pump is on the passenger side of the block. It is mounted with gasket, and two bolts. The pump has an arm on it which is ran by a rod inside the engine. The rod pushes down and the spring in the arm pushes the rod back up, then the rod pushes down, and so on.
This motion over a diaphragm, back and forth, works like a syphon hose kind of, to draw the gas out the tank, through the filter, and into the carb.
Steps:
Remove fuel lines
Remove bolts
Remove Fuel pump
Easier to put something in front of the pump rod inside the engine now
Scrape the old gasket off
Fit new Gasket
Pack fuel pump arm cavity with grease
Fit new fuel pump (shove rod back up if you have to)
Tighten bolts
Hook up gas line
Start and watch for leaks
So I took mine off, it looked old. A word, or note. When you pull your SBC fuel pump out get a small screw driver, piece of wire, or whatever in the hole to catch the pump rod. The rod will slide all the way down, then you have to fight to get it up and in position for the next fuel pump to fit properly.
I let my rod drop. It took me longer to get it, shove it back up, and hold it there, than the putting the new fuel pump on. Damn rod, even tried my magnetic pick up tool because I couldn't get a screw driver in front of it.
Of course you have to unhook your hoses, but the new fuel pumps have lovely lettering that states "In" from the tank, and "Out" to the carb right on them.
The biggest problem is that damn rod. The bolt are easy to get to, the gasket easy to place, and the whole job is pretty easy. But a word of warning. Your standard SBC will not have enough crankcase pressure to kick the oil up to lube the pump. Pack the arm cavity with grease before installation.
Many people will tell you this will "contaminate" the oil, but don't do it and you'll be changing the fuel pump again very soon. My old one barely had any remnants of grease left in it.
Also don't forget to scrape off your old gasket, and use a new one. If you don't' scrape it off you'll get gas spraying out everywhere. And gas is like gold, too expensive to throw away (that was lame).
Now to the electric versus mecnhanical fuel pump debate. Electric is much better, you can regulate your pressure, get better performance, and it is easier to install.
Know what? An electric fuel pump has left me stranded. They don't have to get weak first, they can just die, you can blow a fuse, and your car is DEAD until it is replaced of course.
A mechanical fuel pump has never left me stranded. They get weak, then they die. But you get notice. I like notice. Hey this is getting ready to go bad, time to change it.
I like that.
Not like our VW, which decided just not to start in parking lot one day. No grinding, no weak starts, just boom the starter dead. Would you rather have that? Or would you rather have a starter you could grind for a day or two, until you fix it?
That ends the electric versus mechanical fuel pump debate for me.
So I replaced the fuel pump. Easy job, two hoses, two bolts, and I took it for a drive. Runs excellent. I notice at this point to not trust my lying temp gauge. It rose to 100 or so degrees and froze, then jumped to 200 degrees and froze. I parked my car, and three hours later still said it was about 200. I tapped it and it fell to zero. Bad Gauge.
By the way, my car normally runs 190. 200 if I am in stop and go traffic, or sitting waiting. If I am on the highway 170 is about normal, so don't let the 200 freak you out.
So I have replaced my tach, which is another blog. But that ruled out my choke theory of opening before the engine was hot enough.
That's the story of me replacing the pump.
Tips: Lube the arm, catch that rod, and scrape the old gasket off.
Subscribe to:
Posts (Atom)